Every year, I have a favorite Christmas decoration. This year, it’s the entire silver tree. I’m so obsessed with how it turned out this year.
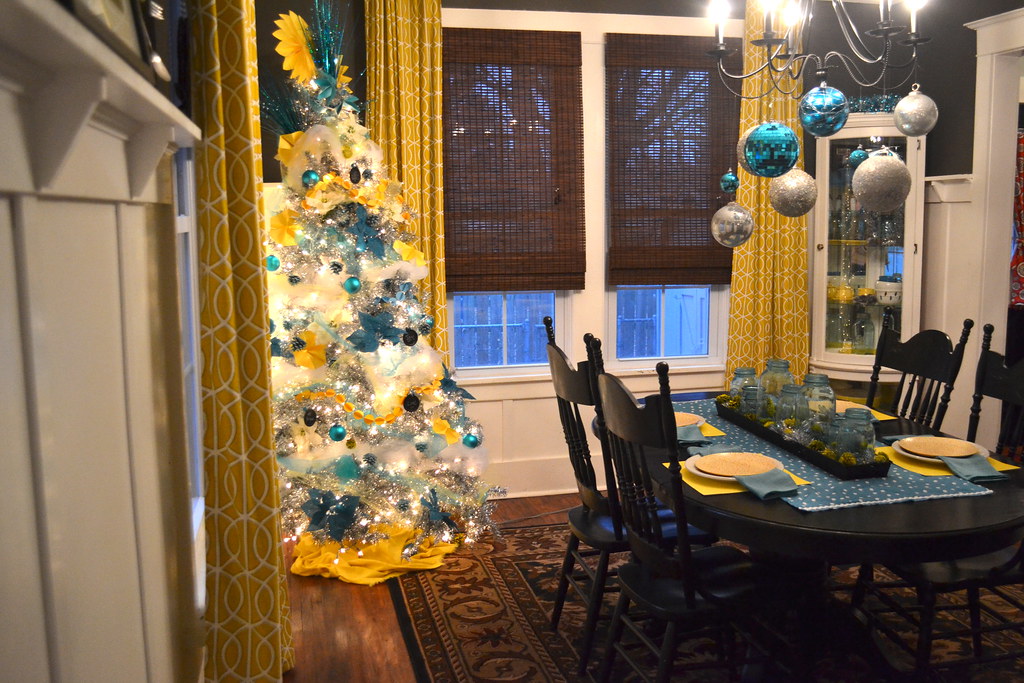
I bought this silver tree two years ago after Christmas. It was the display at a local department store and I had ogled similar trees for three years. I bit the bullet and bought it 75 percent off. Last year, I didn’t have many decorations that worked with the tree. I loved it, but I knew it had more potential.
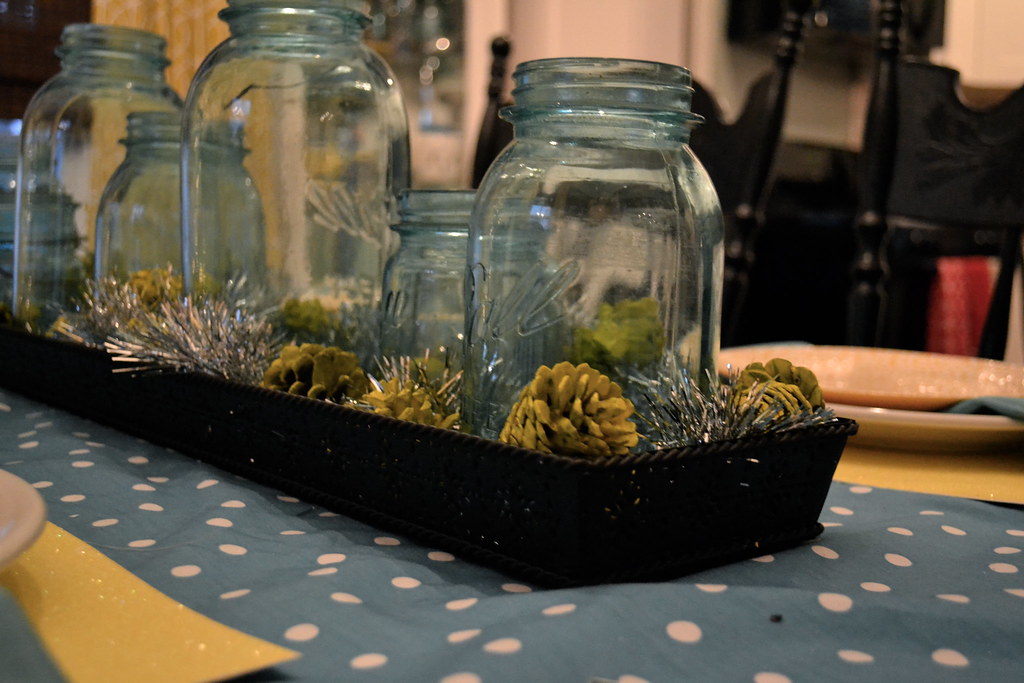
I wanted to make it match our dining space, instead of competing with the yellow and grey and white and touches of blue/turquoise. You already saw my take of the untraditional holiday dining room table a few weeks ago. The tree is an extension of the table.
I didn’t want to spend a fortune to decorate the tree. So, I combined a few thrifty purchases with quite a bit of DIY to make this tree unique and special.
What I DIYed:
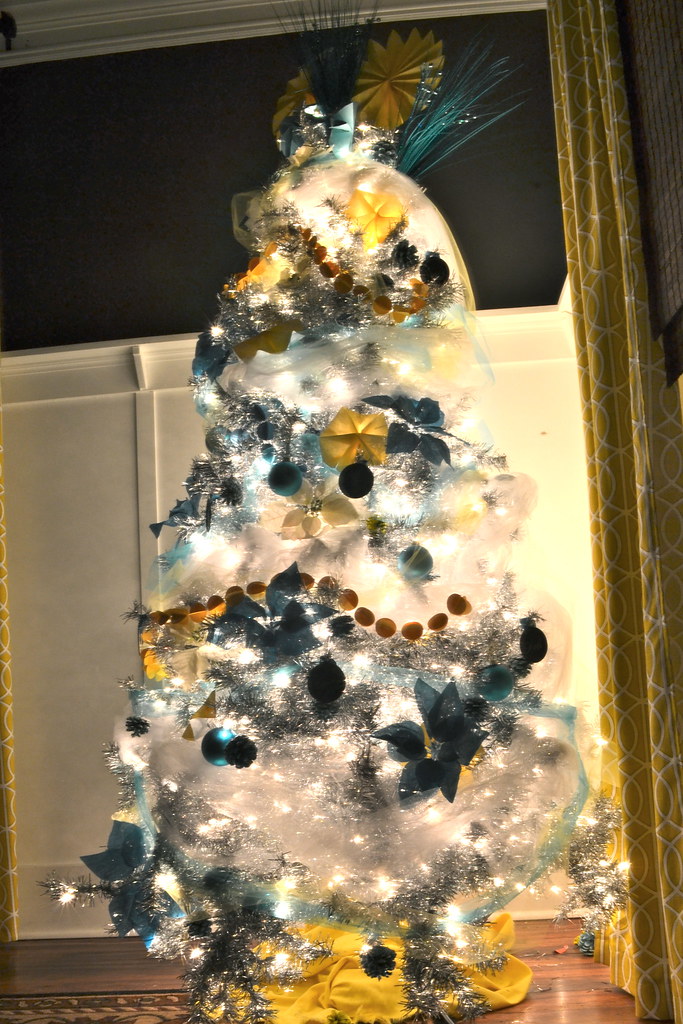
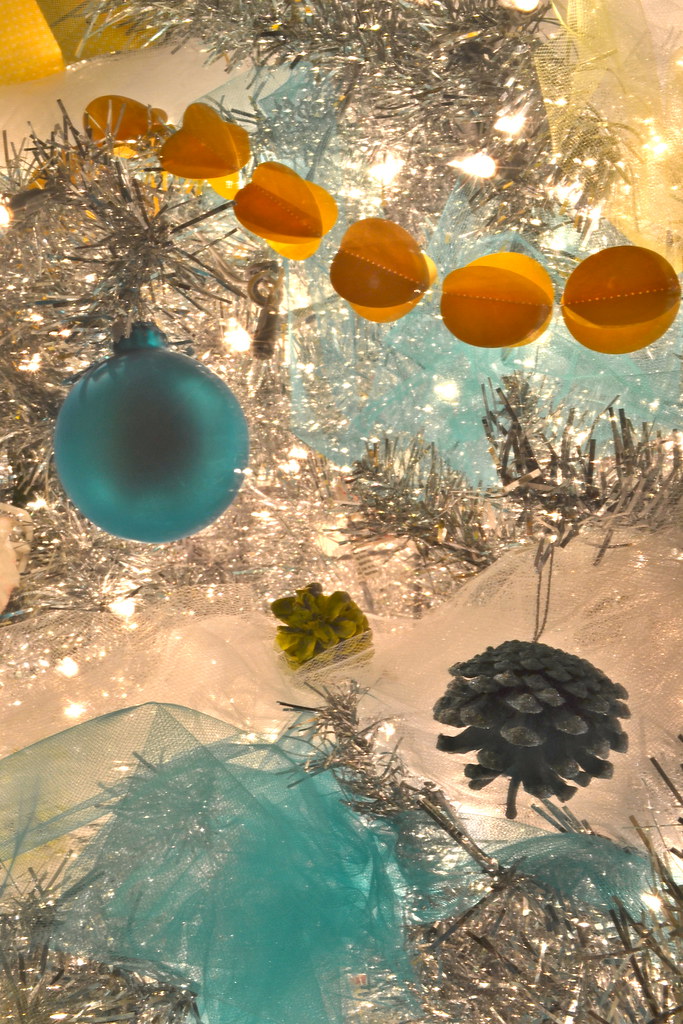
3D paper garland
I had planned to make simple circle garland for the tree. I cut the circles on the Cricut with existing cardstock. They are about 1 1/2 inches each.
Then, I accidentally ran two of the circles through the sewing machine together and realized it made a really cool 3D effect.

This was super easy and turned out to be a great addition to the tree.
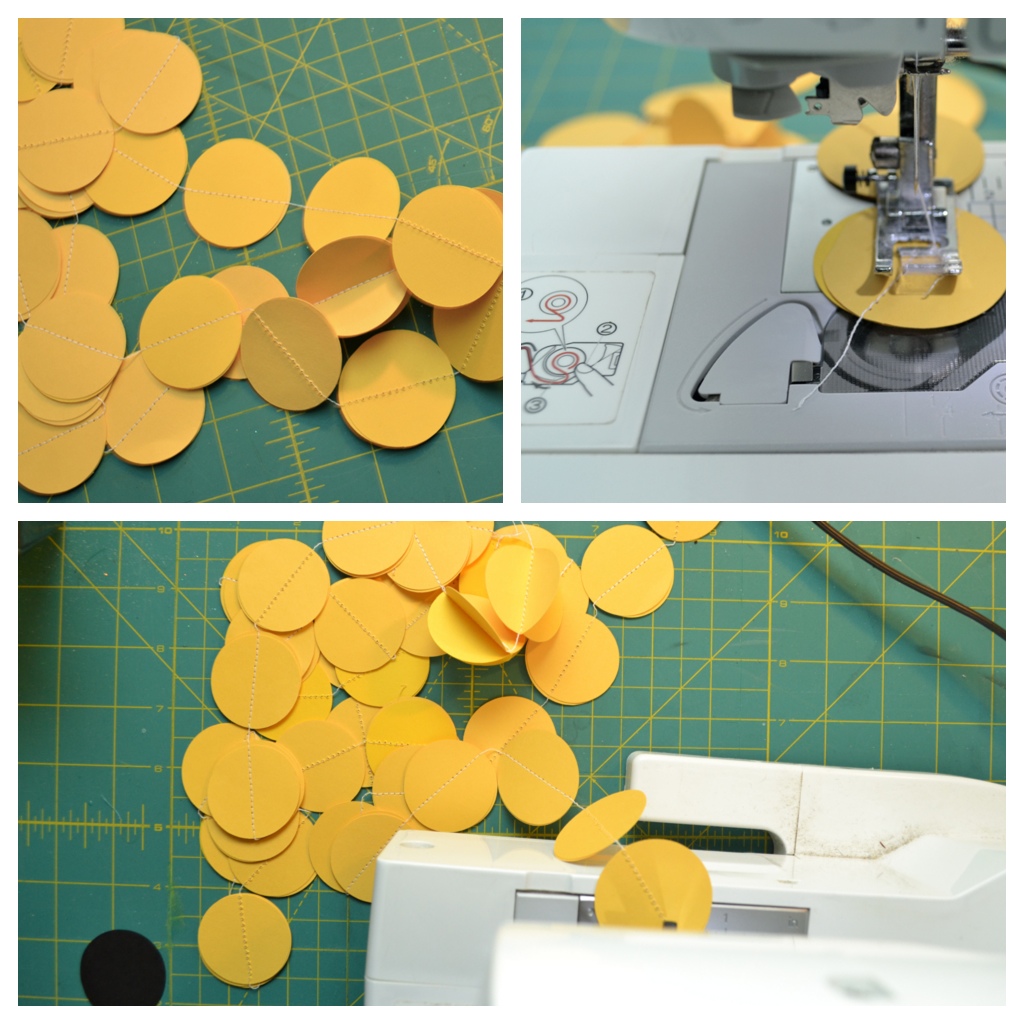
The only problem was that I didn’t have quite enough garland since I doubled up the circles. But, I was tired and didn’t want to make more. Maybe some day. Or maybe not. I think it looks good as is.
Chalkboard ornaments
I totally swiped this idea from my friend Rachel at Maybe Matilda. I was talking about how stinking trendy my tree was and she said that all I was missing was chalkboard. She gave me the okay to run with her idea and I’m glad I did.

To make, I simply spray painted mason jar lids with chalkboard paint. Once dried, I hot glued turquoise ribbons for hangers.
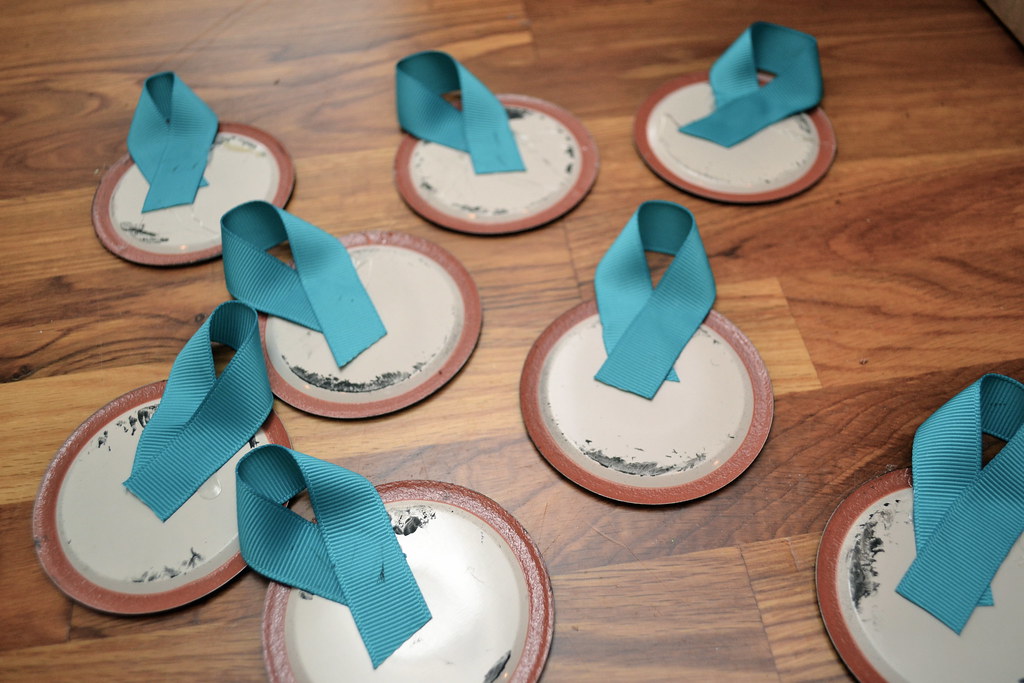
Big, bang and boom.

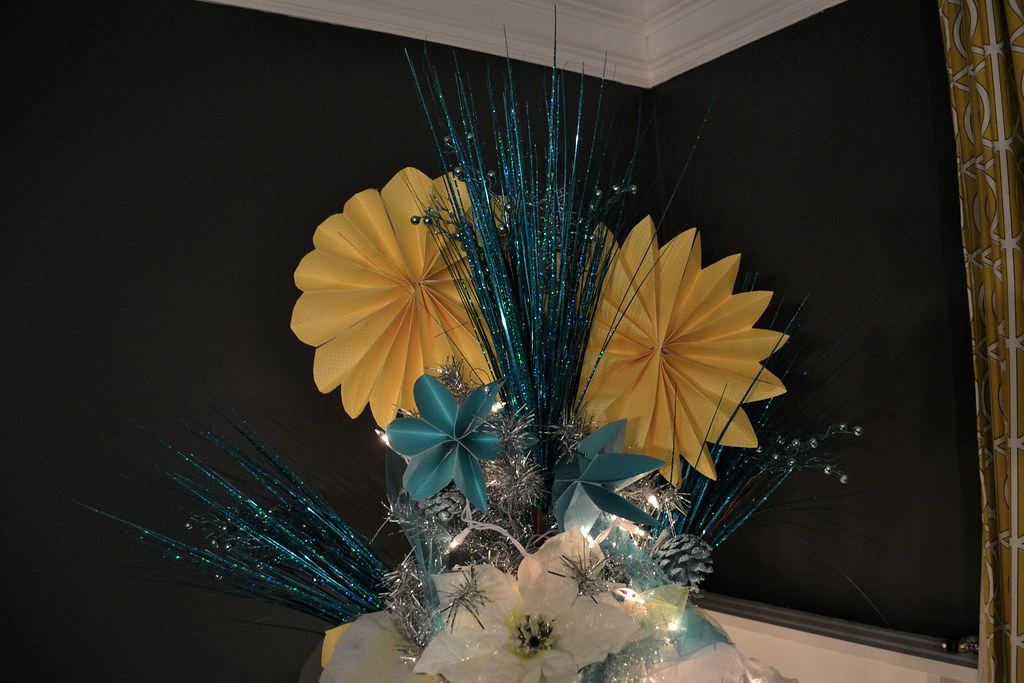
Paper stars
These were my first project for the tree. It took nothing more than scrapbook paper, wire, hole punch and tape.
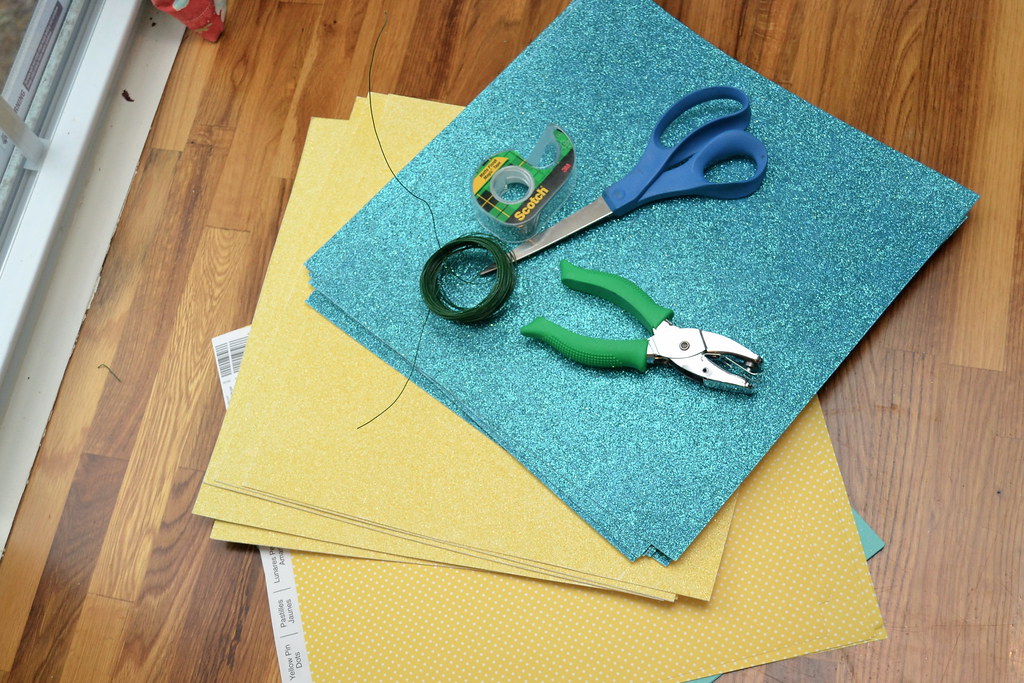
As an aside, the sparkle paper does NOT work for this project. The thinner paper works better.
Accordian fold, half the paper, add two small hole punches and wire.

Then, cut the sections to a point towards the fold. When you pull the paper apart, you tape the sections together in the back. I didn’t take a picture of this part, which probably would have been helpful. But, honestly, I didn’t think it was going to turn out.
But bam. It turned out. And they look so pretty on the top of my tree. (I used wire to attach them.)
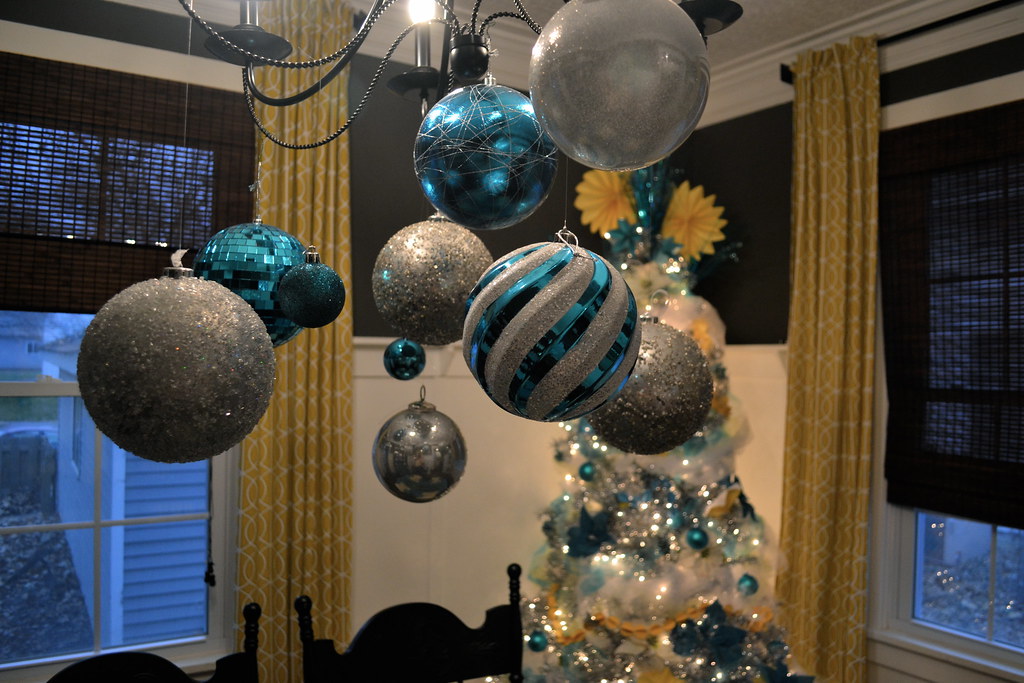
It took a little more work to make all the elements, but I think the tree is perfectly suited for the dining room now.
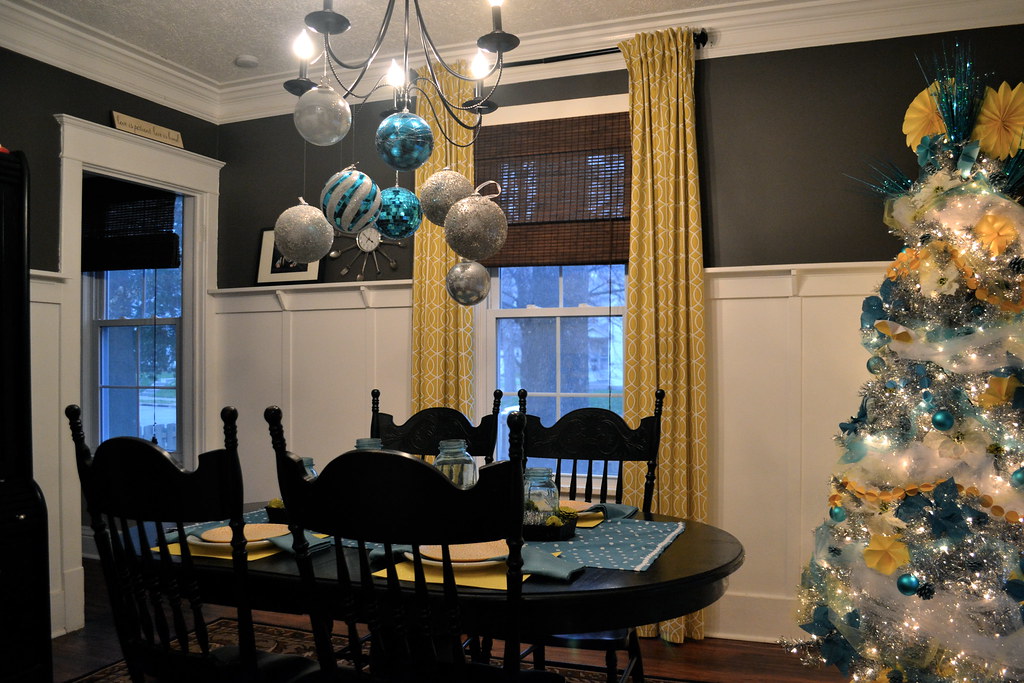
mmmm… I love seeing the tree behind the ornaments on the chandelier.
How many photos can one take of her pretty dining room and tree, you ask?
You have no idea.

Oh my god! This is truly stunning! How talented you are!
Thank you so much, Jo! This was definitely one of my favorites!
That looks awesome Kim! Your dining room is awesome!
I love your color combo! I would have never thought of using yellow! All of your DIY elements are awesome!
I love this non-traditional take on decorating…it’s absolutely beautiful. The paper garland is such a cool touch.
Kim,
Your house looks beautiful!! Love what you have done for the holidays!
Hello, new follower here and I’d like to invite you to join me at my weekly Clever Chicks Blog Hop: http://www.the-chicken-chick.com/2012/12/Clever-Chicks-Blog-Hop-12.html
I hope you can make it!
Cheers,
Kathy Shea Mormino
The Chicken Chick
This tree makes me so freaking happy! I love all your DIY ornaments. I’m about to do the same this weekend because I need a lot of unbreakables because SOMEONE doesn’t understand the words No Touchy!
I think the top is my fave. You are one talented lady. You do Christmas best.
I never thought about making garland like that; it’s awesome! Your dining room looks like it’s out of a magazine! Well done =)
It is definitely non-traditional, but you rocked the socks right off of it. I dig it!
I know someone who will love the canning lid ornaments. I’m gettin’ right on that one!
That tree is awesome! I love the colors and the crafted ornaments! So pretty!
You are so crafty and creative, Mama! I need you to come to my place and put some Kim pizzazz into my home! 😉
Love it. Now I am on the hunt for one of my very own.
Love all of this, kim! That paper garland is the bomb—and the colors are amazing, too.
Beautiful!! I LOVE the 3D paper garland. What a happy accident – and I never would have thought to use it on the tree. I just made a normal paper garland for our mantel and was trying to figure out what to do with the extra length. On the tree it goes! 🙂
I love the colours!! I super love that 3D paper circle garland. I pinned it for next year! Great job!
Your tree is gorgeous! I love the colour combination. The entire room is stunning.
That is a trendy tree! Looks so cool!
You’re out of control. I love the yellow and turquoise color combo. The topper is pretty amazing too. You’re more than welcome to make a trip to my house next December to help me decorate.
I could never come up with something that looks that great … honestly it’s stunning!
I love the garland!! The whole tree looks fantastic. I am still working on decorating our tree. Ugh. I guess I should look at the bright side and think well now I can make 3D circle garland for it! 😉
Oh my god. I never would have thought yellow and turqoise would work for Christmas, but wow! It looks fantastic, I love it!
Oh, I love it! I’m gearing up for some silver and/or gold and blue decorations for my foyer….I had never considered a whole silver TREE, though. Awesome.
I looooooove your tree! The silver is cool to start with, but all the turquoise and yellow and the garland and the paper stars just take it over the top. And I’m so glad you used the chalkboard ornament idea . . . they look great! And we both know I never would’ve gotten around to it anyway. I seriously don’t know how you find the time for so much craftiness. I know everybody says that to everybody, but I seriously mean it–you work full-time, you have a baby, you’re a landlord (lady?) . . . it is amazing.
i am in love with how this looks! the paper stars are the best! good job on diy’ing it all – it definitely coordinates and i’m sure it makes you happy to see each day 🙂
Your tree makes me so so happy! I love every part of it.
Oh Kim! You always have the best trees!!! I love it! Such fun and bold choices. I see Dark to Deck the halls is back and bigger than ever. You rock star!
I’ve been such a bad blogger follower these days. Hopefully there is still time for me to link something up. Have a great week!
SO SO SO PRETTY!!! Your 3-D garland is the same way I made Katherine’s mobile. I love it all!! The chalkboard, the tree-topper, the colors!
I went off the deep end last Christmas and bought a tiny shiny pink tree… which I still love to pieces… now I think I might need a shiny silver tree, too! This is a slippery slope, isn’t it?
So much craftiness in one place! Love it! 🙂 I would never have thought of that color combo for Christmas, but it TOTALLY works.
Oooo, we need a blogger holiday homes tour! Love the color combo!